Sunday, November 27, 2011

Book Page Wreath - I had to try it


I am a huge fan of all the book page wreaths on the internet. I like that fact, that everybody has their own technique and every single wreath is unique. I like the vintage feel and the fact that it is a conversation starter. We had some friends over and they mentioned it hanging on the wall."How cool is that" I said I made it myself. They were impressed.

Here are the instructions and the technique I used:


1. You need: Book I got for free
Some metallic ink (gold and bronze)
Hot glue gun
Styrofoam ring 
Scissors (optional but for cutting string hanger)
String or ribbon for hanging
Time: It took me about 6 hours to complete the wreath    


2. Styrofoam ring. Mine is 12 inches I think. I got it for $6 at Michael's with a coupon. In some tutorial they tell you to paint the styrofoam a gray or brown. After I did this project. I would recommend it because should there be any holes in the wreath (you will see what I mean below) you would probably get away with some of them as they would not be very visible. The white styrofoam reflects light well so you can see every hole. 


3. I used the ink on all three sides of the book so that I have some color variations in the book page wreath.


NOW THE FUN PART


4. Now you rip all pages out of the book.


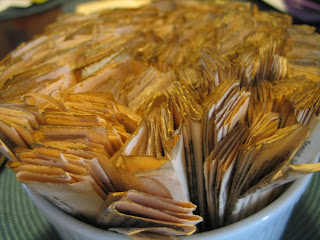
 5. Then you fold and fold and fold and fold. I took the page lengthwise and folded it about 5 times like a harmonica. Then I went over the ends with the gold and bronze ink again.


  6. I started with the back of the wreath and overlapped the pieces. Lining up with the back opening.     On the outside the book pages stuck out a little bit. It was a lot of work because I had to glue the "harmonica" together otherwise it would have opened.


7. Then you just start gluing the harmonica down with hot glue. You can either fold the harmonica in half and glue it down (will give you shorter ends) or you can fold them at the end and glue them down.


8. So you just work your way around. Pull the harmonica apart to make the wreath look fuller.


9. Once you have covered almost the entire styrofoam turn it around (back side up) and glue the end  pieces right next to each other.


10. Go around and around until the wreath is very finished.


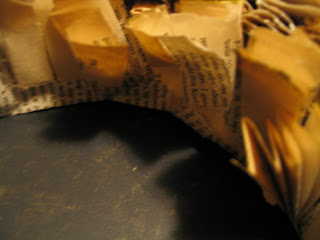
11. Then I ripped two pager into little pieces and glued them around the seam in the back with hot glue.


12. After the wreath is finished you have to look for holes. You can either try to move the harmonica  (open it wider or close it) to cover the hole or you can glue in some pieces in like I did in these photos.


13. You an attach a hanger to the back with hot glue or just hang in on a nail in the wall as is. Since it is styrofoam there are no issues with punching a hole into the wreath.


ENJOY!

Karoline


Friday, November 25, 2011

Handmade wedding decorations

August 26th 2011

I knew that I wanted to get married in a castle. Peter wanted to get married in Germany. So it was a match made in heaven. I was in Germany in January and was looking for a venue for the wedding and after searching on the Internet we found something that would be perfect for us.

The Deuring Castle  - Church wedding and reception


It is simply beautiful. A 4 Star Hotel and Restaurant in Bregenz, Austria. After confirming the date I wanted to check out the rooms to get an idea for the decorations.


Since I was there in January and there was snow I could only imagine how beautiful it would be in the summer.


I have decided on a color pallet I found at Stampin' Up!. I thought the decoration should be elegant but romantic. I love the designer paper Elegant Soiree and the color Baja Breeze.


Elegant Soiree Designer Paper 2010/ 2011 catalogue


I liked the dream board, especially the pale blue, gold and beige.


My dream wedding cake - but in Germany they don't normally don't make tiered cakes so I was hoping I would get lucky with my baker.


This picture was my inspiration for the flowers

I wanted this to be my wedding bouquet

Tiara

Jewelery Set


As you can see. I put a lot of thought into the preparations. My challenge was, that I had to bring everything to Germany or I needed to ship it there. 

I started on the wedding decoration about 3 months in advance.

I wanted to make the table decorations, invitations, candy buffet decorations, my headpiece for the civil wedding as well as a sash for my civil wedding dress.

This was our Save the Date as well as our invitation


Table numbers, napkin rings, candy buffet containers and program for the church ceremony

Guest book, and antique keys with tags for guest favors


My mom made these little decorations for the benches 
Place cards and Deuring Schloessle menue


We did find a baker who was able to somehow replicate the cake I wanted. I was very happy and it tasted great!


It was more that I could have ever hoped  for. I love you honey!

Details of civil wedding to follow....


Related Posts Plugin for WordPress, Blogger...